Cloud9 is dead, long live VSCode Remote!
 Photo by Silas Gregory on Unsplash
Context
As an AWS partner, I often support some AWS workshop, helping customers master the craft of using the correct AWS services. Those workshops are prepared by AWS and very often use Amazon Cloud9, a service that provides an IDE in the cloud. It is really convenient as you don’t have to provide any credentials. As long as you’re logged in to the AWS console, you inherit the permission of the logged in profile.
On July 25th 2024, AWS announced the retirement of the Amazon Cloud9 service. Of course the thousands of workshops using Cloud9 have not been updated to adapt to that change. When running the workshop at an AWS event, they can start new Cloud9 instances, but on your own account, it’s not possible to start a new instance anymore. In this post, I will present how quickly create a development environment that provides the same features as Cloud9.
Disclaimer: the installation is for POSIX like systems, whereas it should be feasible to user the same technique with Windows, I can’t test it thoroughly.
Prerequisites
There are only a few prerequisites. Let’s start by setting up CDK that can be installed with the following command:
$ npm install -g aws-cdk
Just in case you don’t have node installed on your computer, you can have a look at the installation page.
The next one is VisualStudio Code that you download here with the Remote Development extension that you need to install.

Finally you need some AWS credentials to connect to your account. The creation and configuration of those credentials is outside the scope of this blog post. You can refer to the AWS documentation for that.
Launching the compute environment
Then we need to launch an EC2 instance that we can reach from our development environment. To secure the connection we will place the EC2 instance in a public subnet attached to a security group that only allows connections from the development environment IP on the SSH port (22).
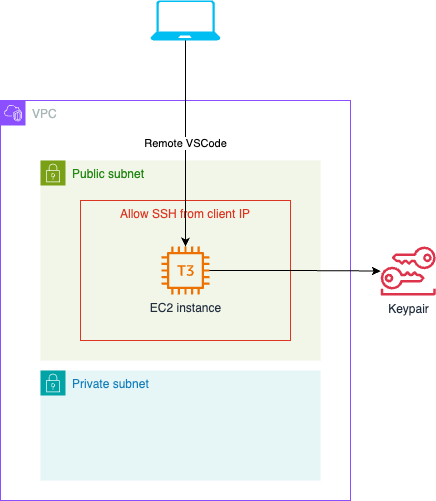
Hopefully, everything here has been automated with the help of CDK.
$ git clone https://github.com/dmetzler/aws-workshop-ide.git
$ cd aws-workshop-ide
$ cdk deploy
at the end of the deployment you should have the following message that gives you the public adress of the EC2 instance. That EC2 instance is only accessible from your current public IP as it is protected by a security group.
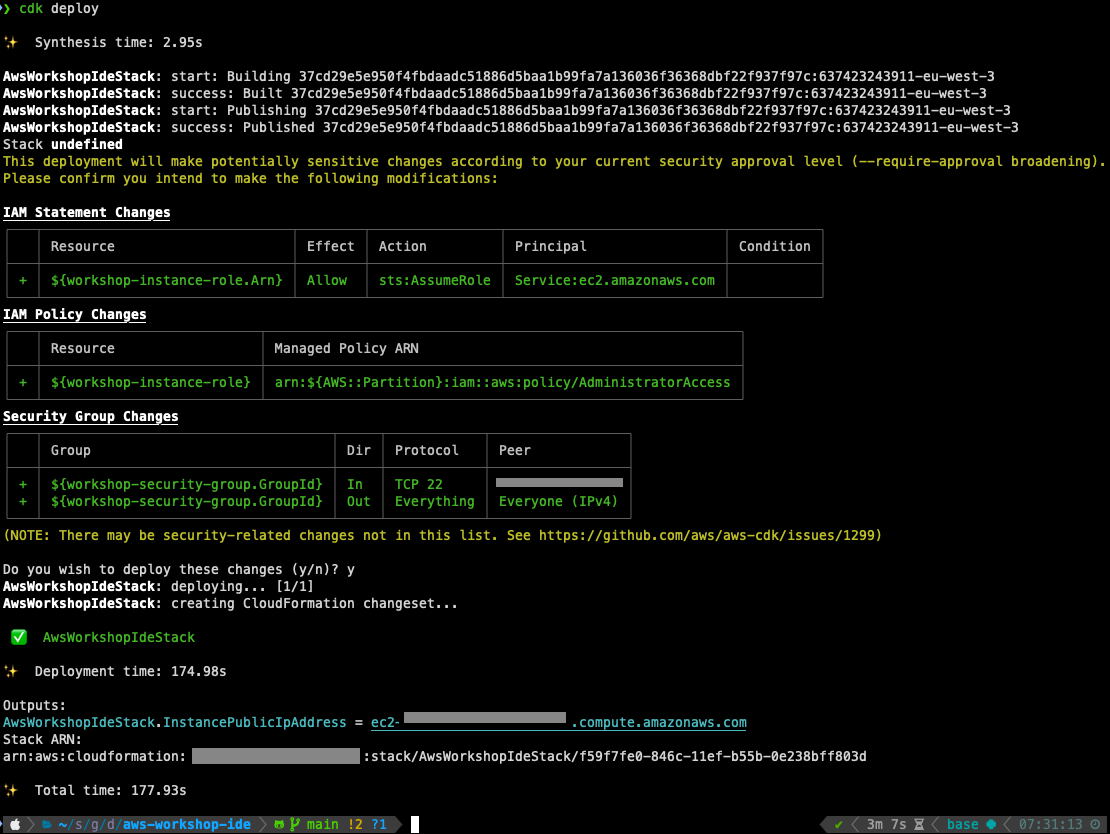
The following steps have been run by the CDK automation:
- Deployment of an SSH keypair using your own
~/.ssh/id_rsa.pub - Creation of a security group allowing only your public IP to connect through SSH
- Deployment of an EC2 instance in a public subnet that is attached to that security group
Remote Connection with VisualStudio Code
Now it’s time to start VisualStudio and connect to a remote host using the button in the lower left corner of the VisualStudio Code window.

Then select the Connect to host entry in the drop down list and enter the following:
ec2-user@ec2-XXXXXXXXXXXXX.compute.amazonaws.com
by replacing the part after the @ with the public address given in the CDK output. A new window opens where you can validate the fingerprint of the connection. That’s it: you’re on a remote connection where you can open remote folders:
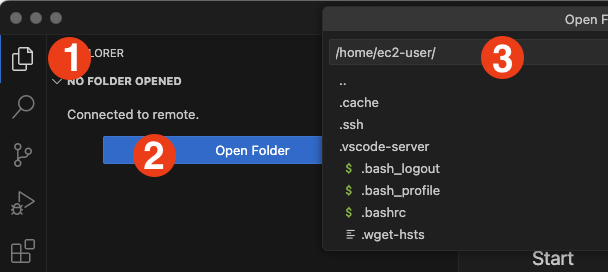
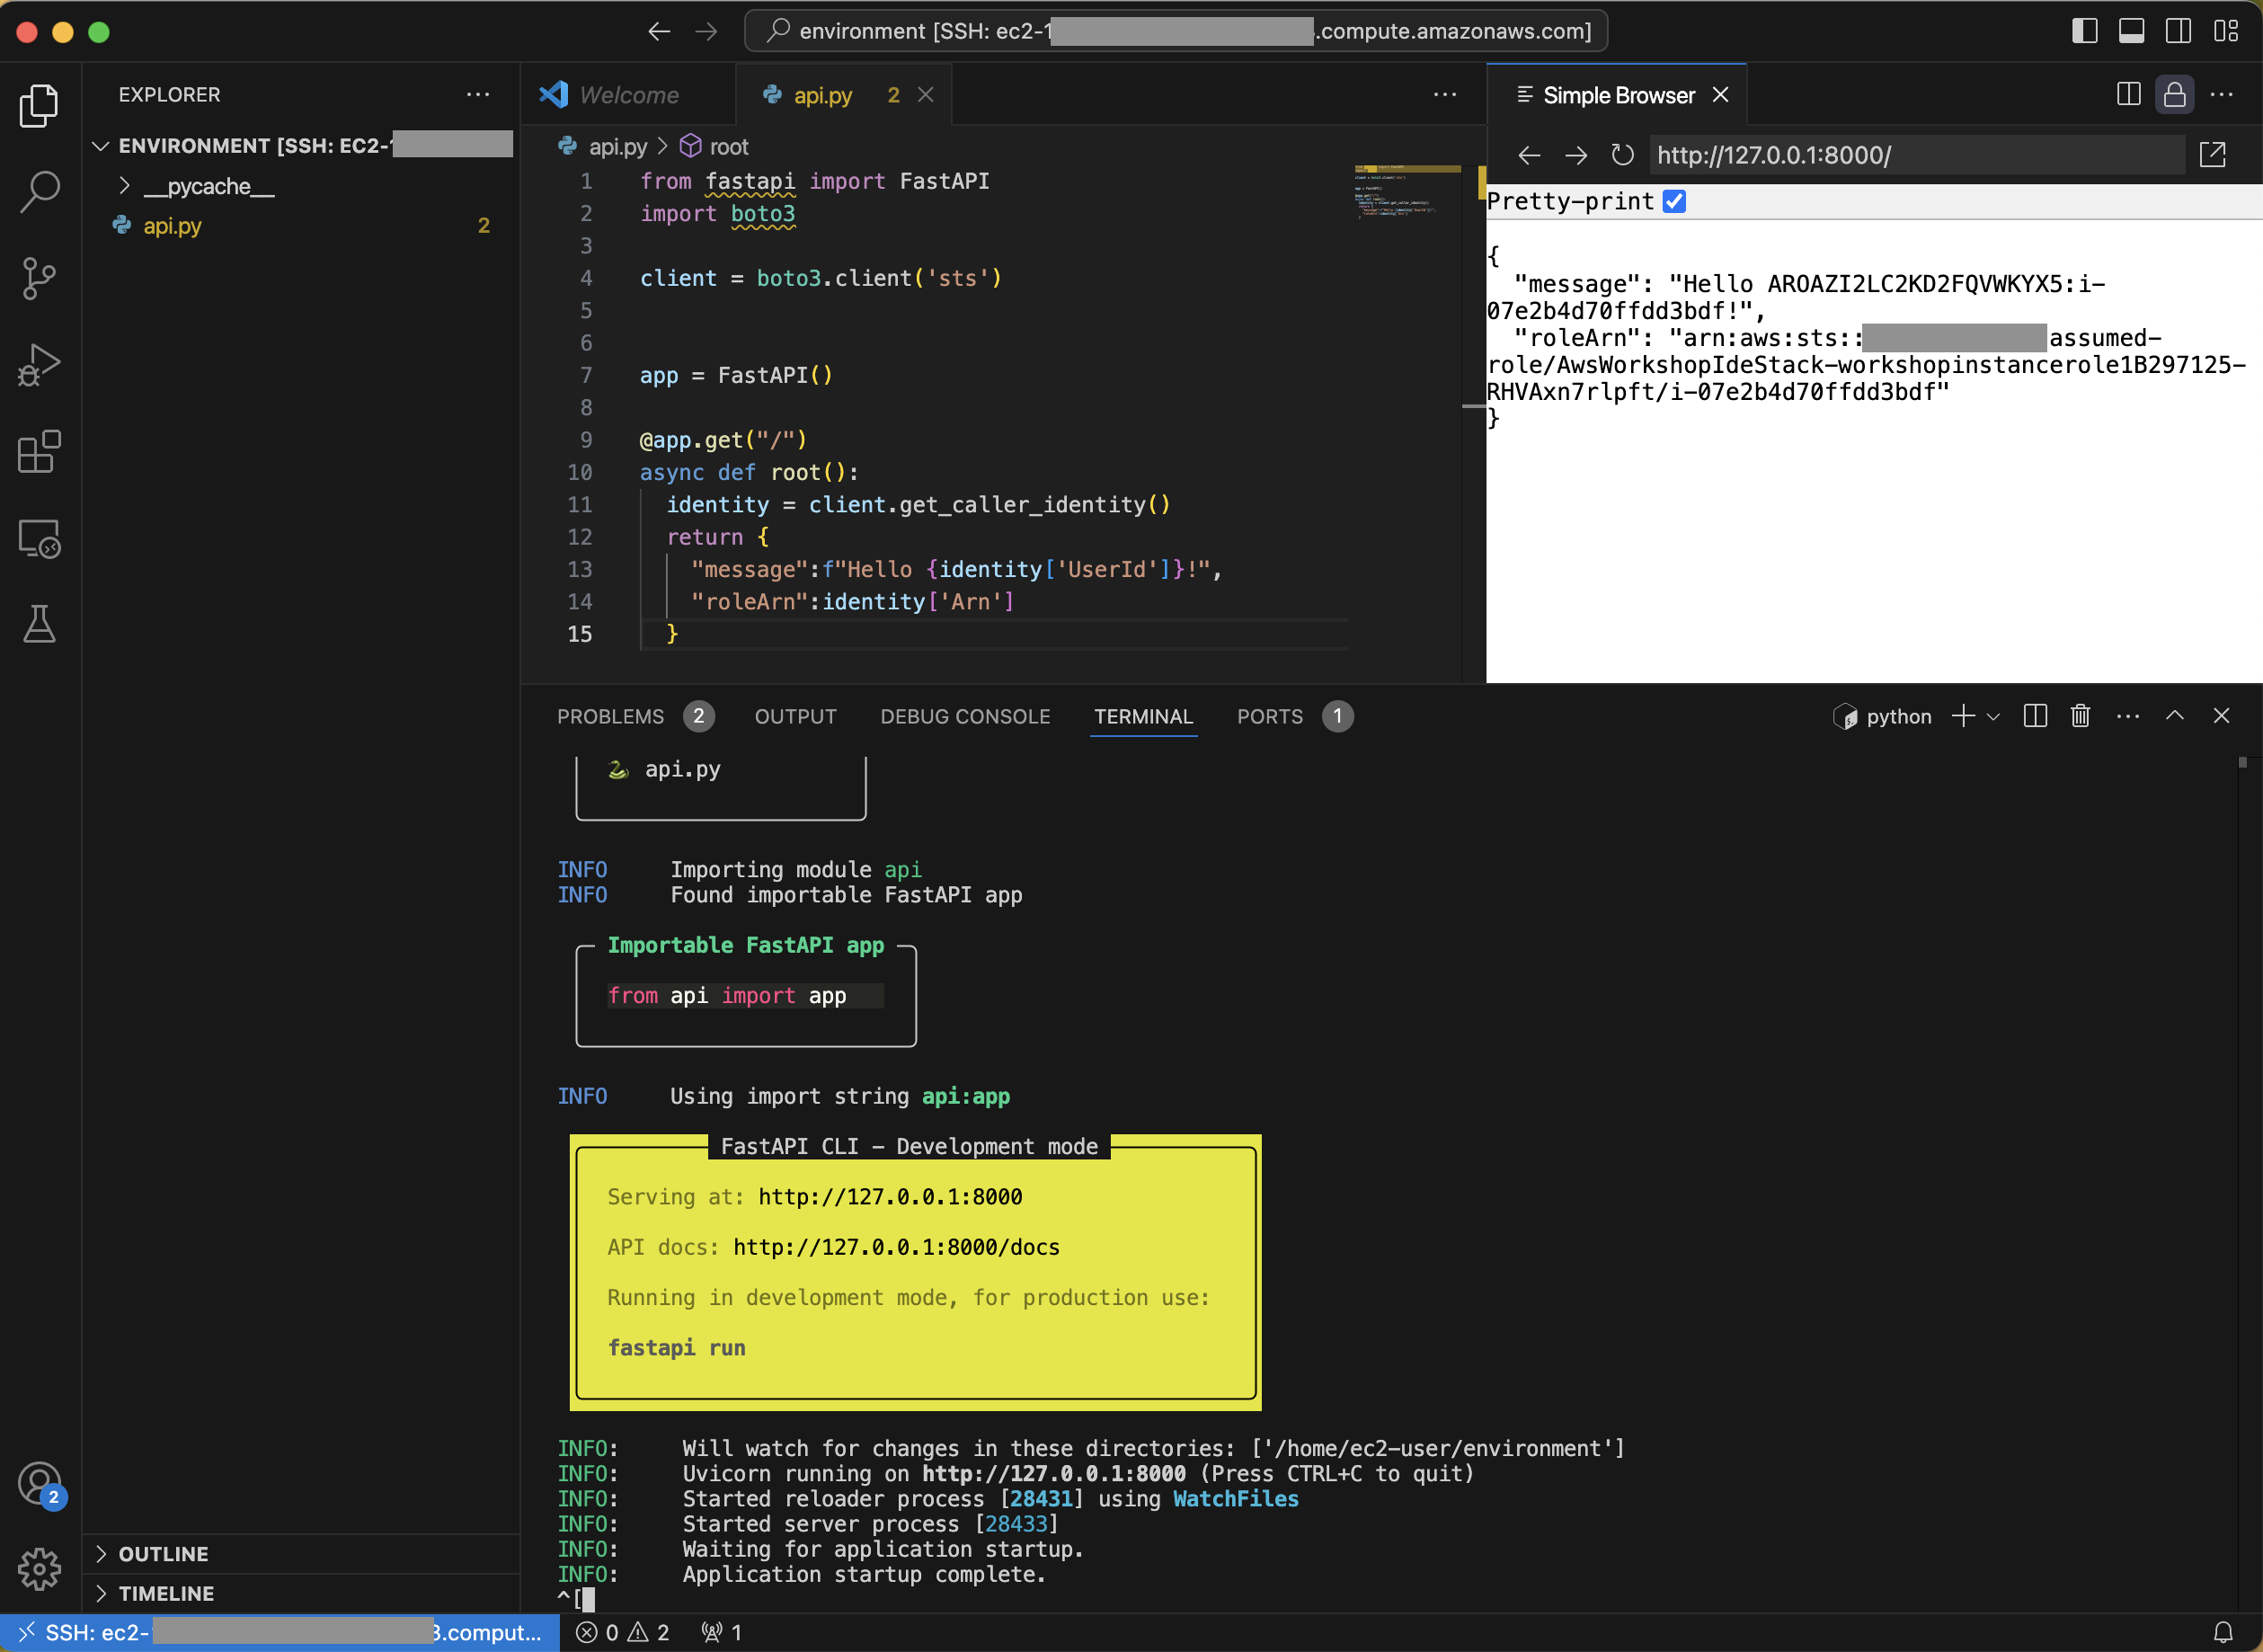
Select and open the environment folder. You can now create some files and code directly on the remote instance. The beauty of the setup is that VisualStudio can automatically forward the ports of the EC2 instance to your local instance. That allows for instance to code a small API in Python and being able to browse it locally. Let’s do it!
Create a file named api.py in the environment folder and fill it with this content:
from fastapi import FastAPI
import boto3

client = boto3.client('sts')


app = FastAPI()

@app.get("/")
async def root():
  identity = client.get_caller_identity()
  return {
    "message":f"Hello {identity['UserId']}!",
    "roleArn":identity['Arn']
  }
In the Terminal menu, click on the New Terminal item: it opens a terminal in the bottom section of the window. Now run the following commands:
$ pip3 install boto3 fastapi[standard]
$ fastapi dev
VSCode automatically detects that some ports can be forwarded and offers to Preview the result either in your own local browser, or in a preview window in the editor. Here is a sample screenshot showing the resulting setup, and yes THIS IS ALL REMOTE:
Cleaning up
When you’re finished, you probably want to cleanup your instance, at least to avoid incurring charges! Thanks to CDK it is as easy as launching the following command in the local aws-workshop-ide folder:
$ cdk destroy
Conclusion
Cloud9 is dead, probably for the better: it was becoming old and I encoutered a few problems in the past to just provision the correct instance type. By using a remote VSCode setup, we can accomplish exactly the same kind of configuration - allowing users to code remotely and inherit from the remote instance role permissions. The CDK automation can of course be customized to fit your preferences like:
- Choosing a custom VPC to launch the EC2 instance
- Specifying a different AMI
- Increasing the default EBS size.
Feel free to comment here, add issues to the repository or even send PR to contribute to it!